
Spire tutorials
How to install
download here: iOS App StoreHow to create a Project
How to use “Sound Check”
Upload from Spire - to your Google Classroom - Google Drive
1) How to install Spire
Note, at the time of recording this video, I didn’t realise the Android version requires the “Spire Studio” hardware.
2) How to Create a new project in Spire
3) How to use Soundcheck
I recommend you try several different placements of the recording device, so see which captures the best sound from your instrument.
Remember to redo the sound check process each time to optimise your dynamic range and prevent distortion.
The other option you can try is Garage Band if you are on an iOS device, but to honest, its a lot more effort to get the same kind of result. Spire is much more user friendly and gets you straight to what you need and recording fast and easy.
More Audio tips coming soon……
Upload to google Classroom
Please first read the Step 5 instructions on main Virtual Performance Guide page
It is essential you have followed the step to log in to Google Classroom on your capture device.
4a) Upload to Google Drive
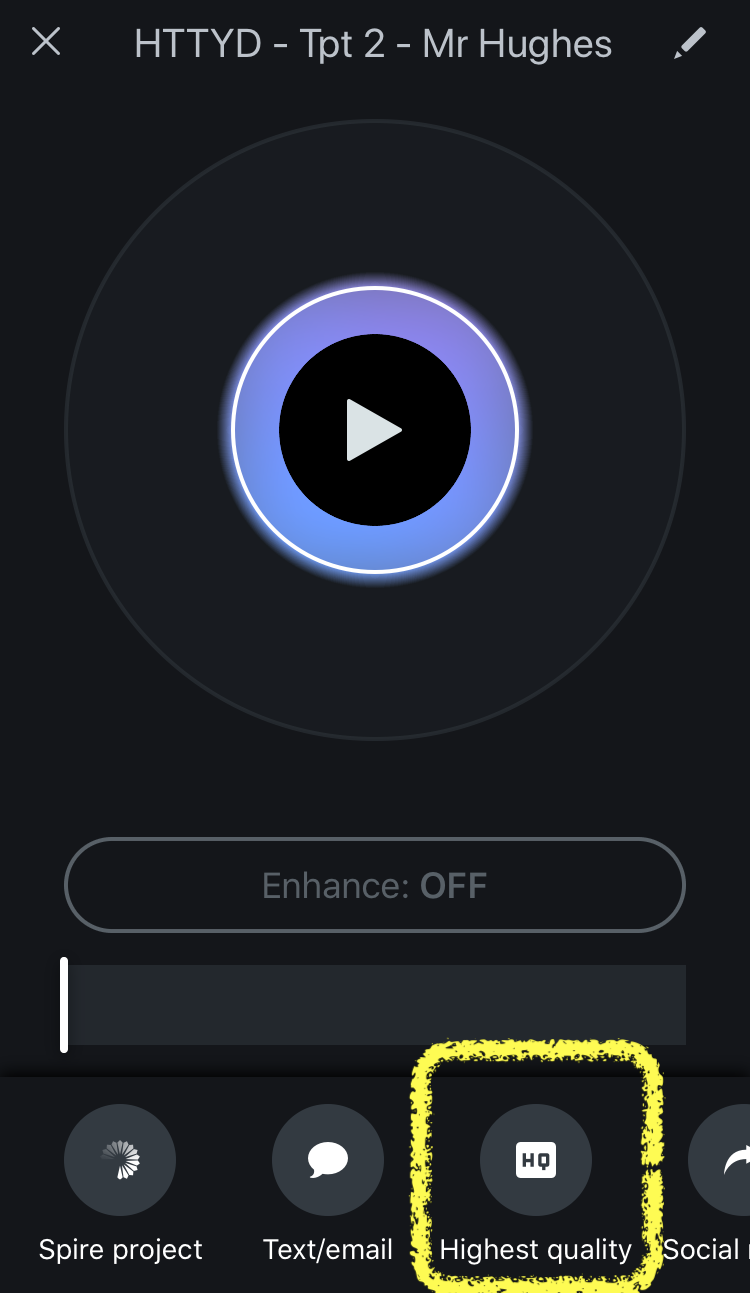
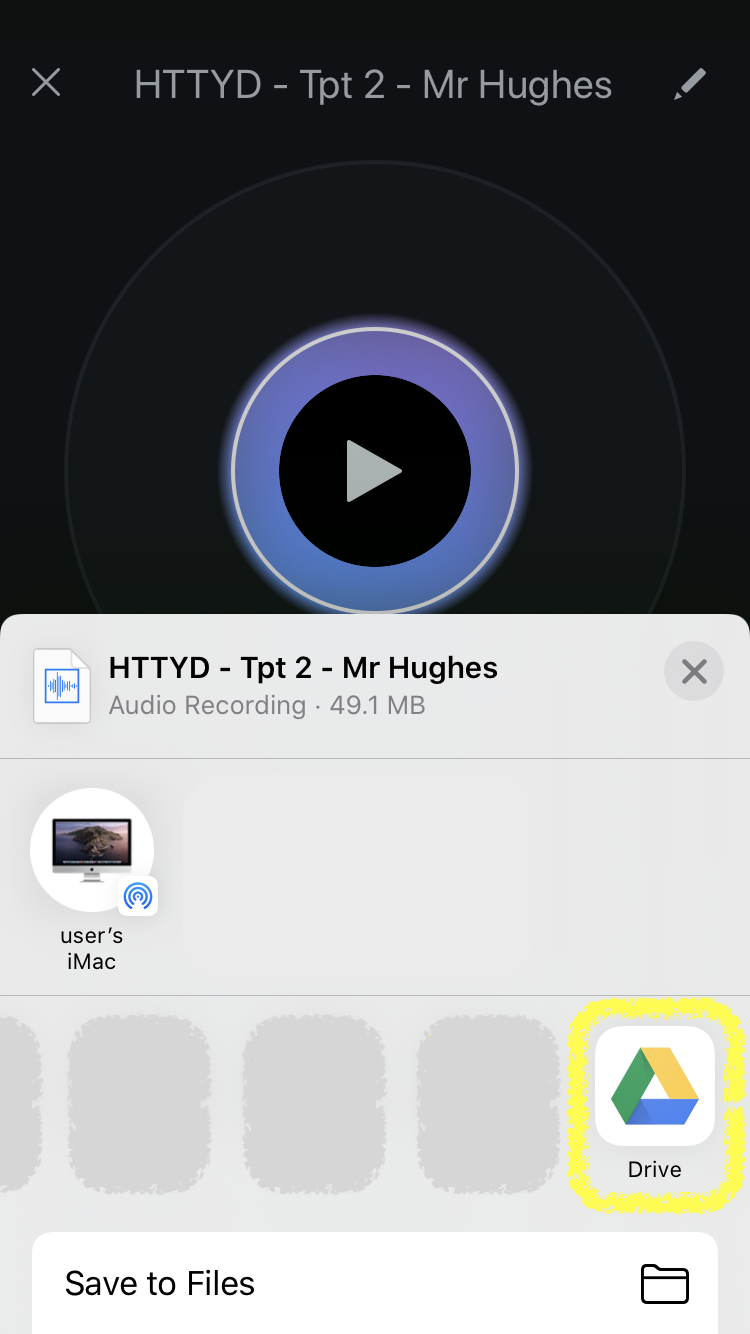
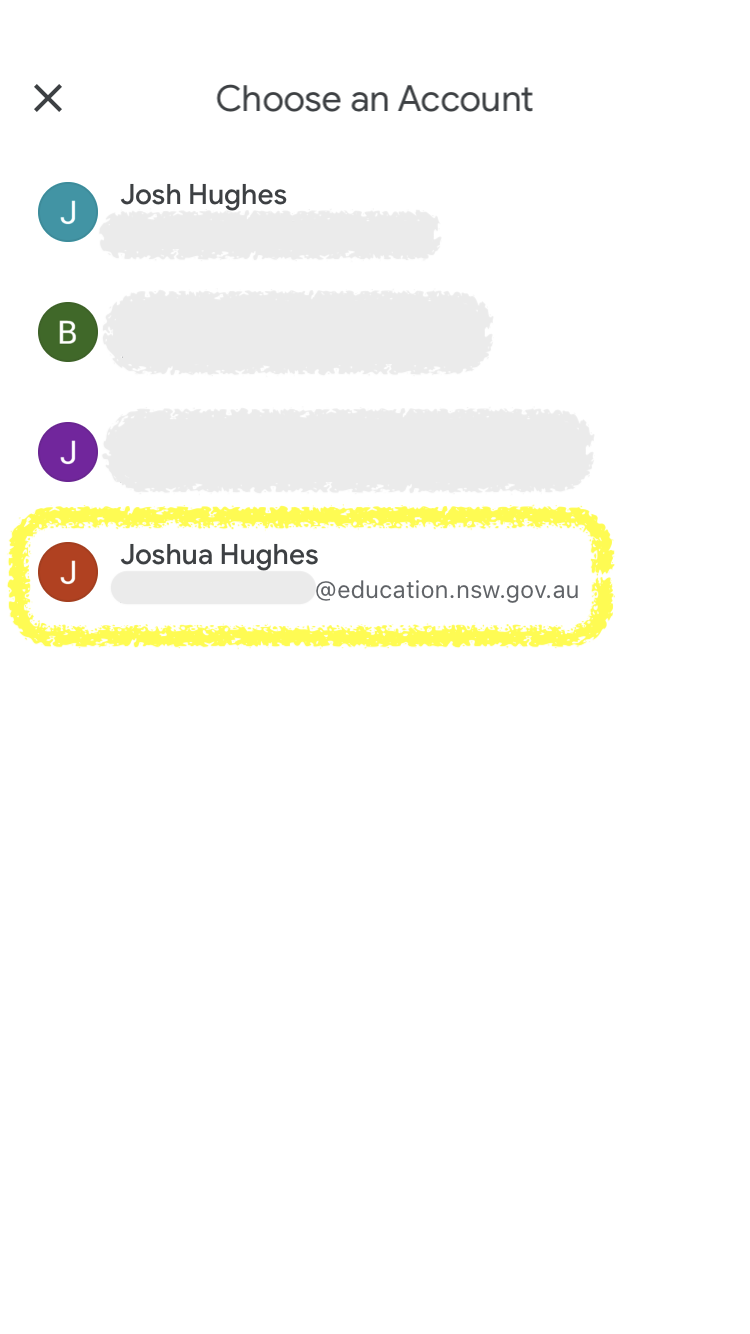
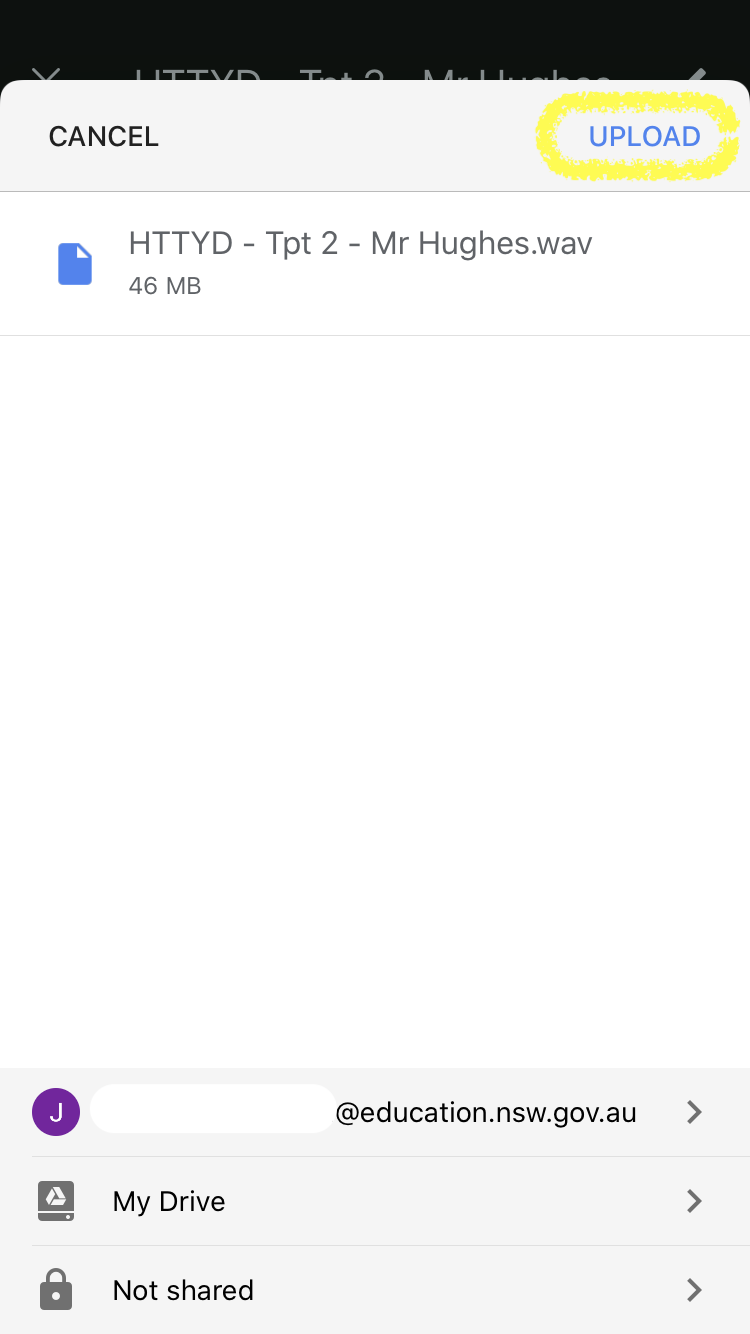
Instructions match the screen shots:
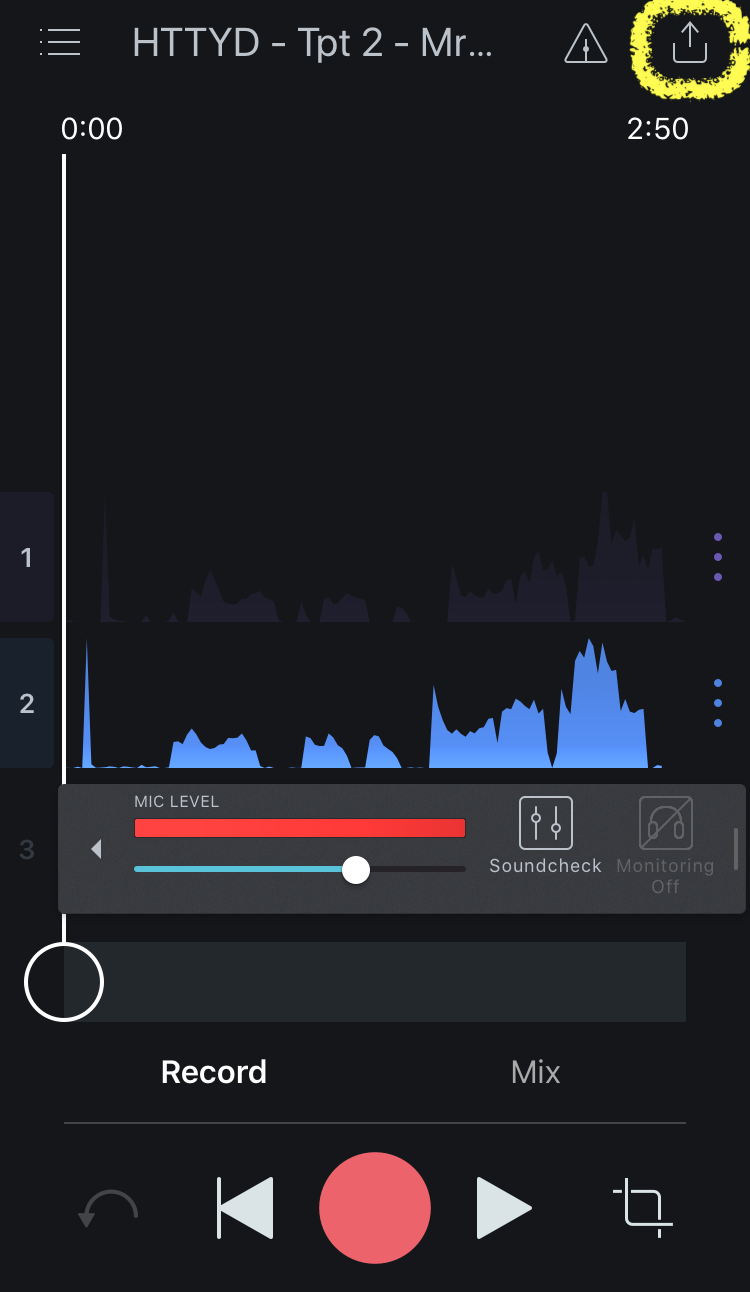
Upload Icon - top right
Highest Quality - bottom centre
Google Drive Icon
Choose an Account (if needed - this may already be sorted if you have one account and it’s already chosen)
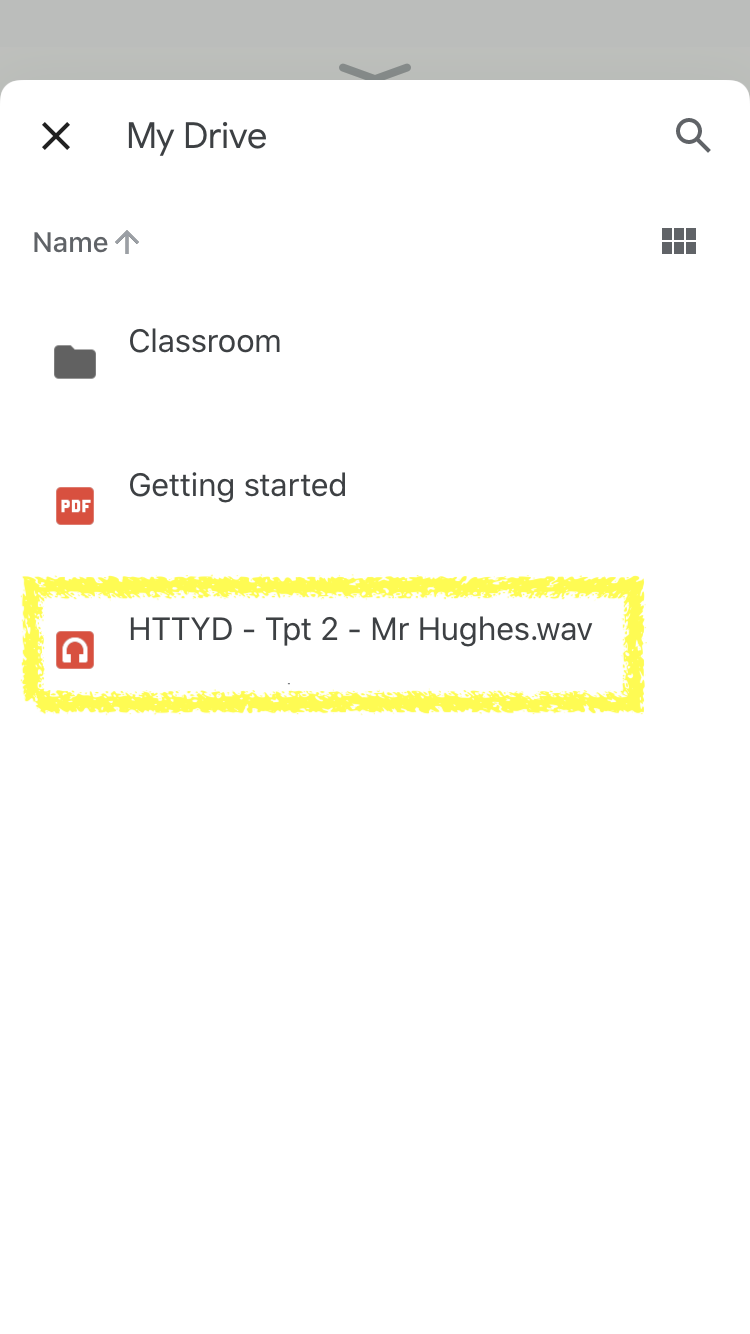
You can choose which folder to store it in where it says “My Drive” on my screen shot.
Upload - top right
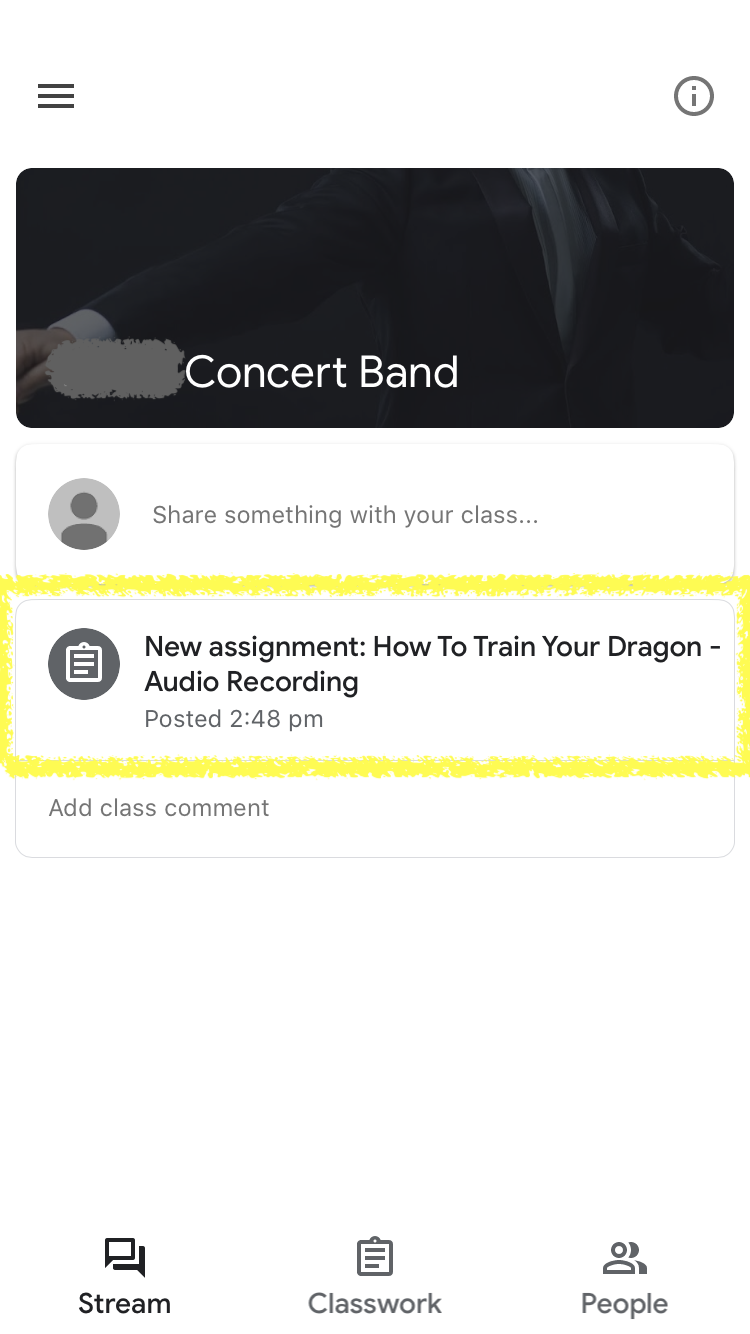
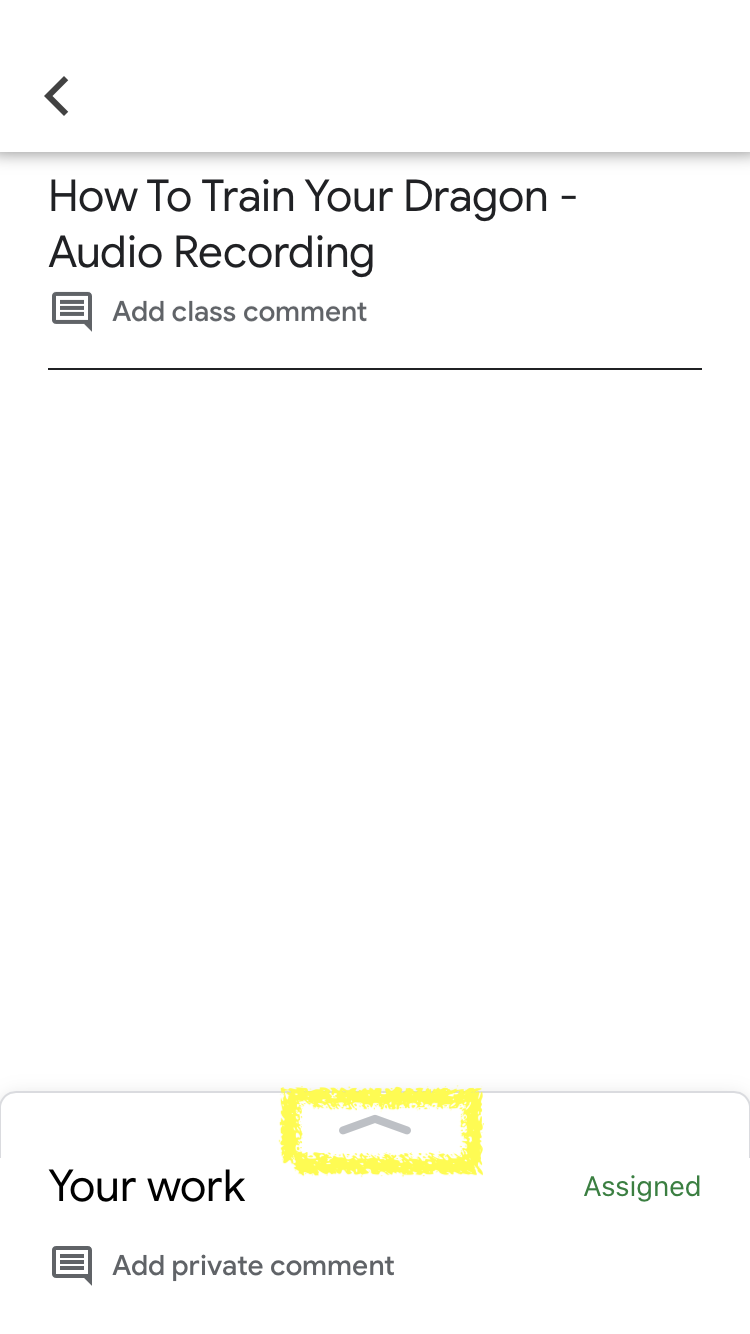
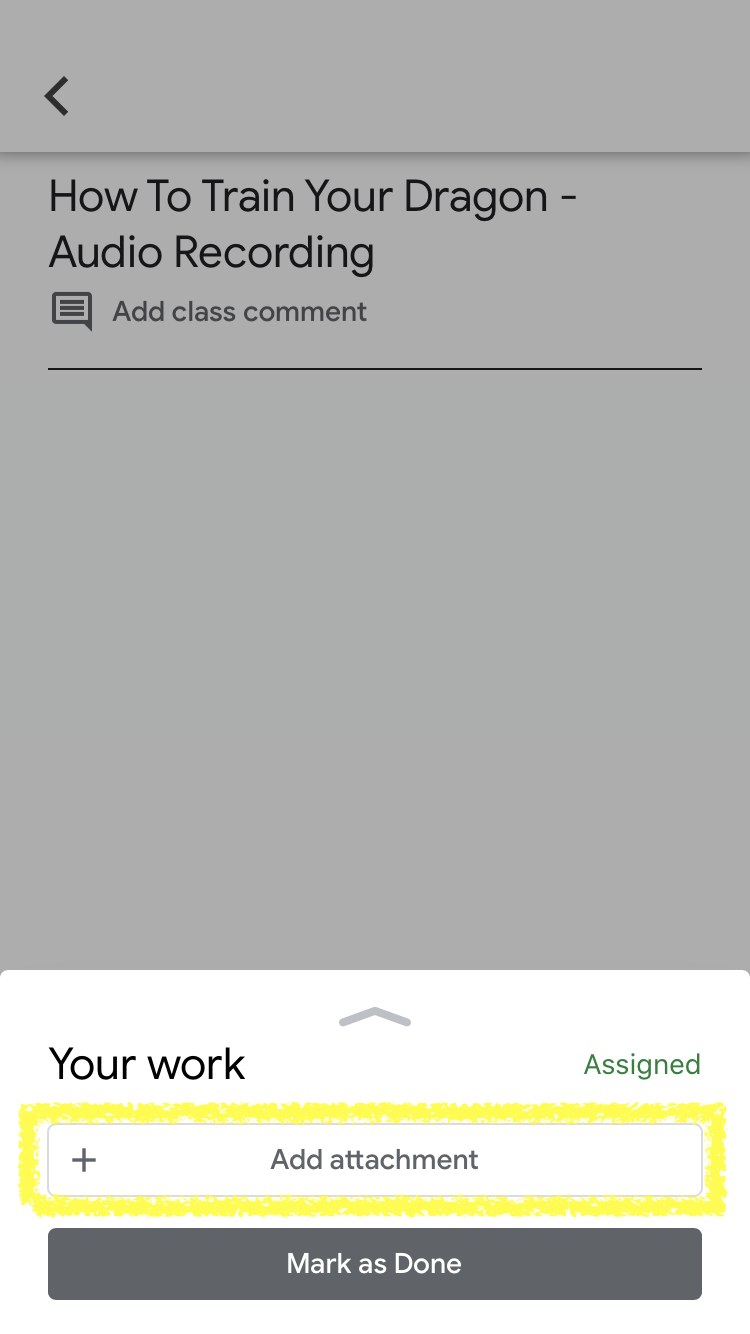
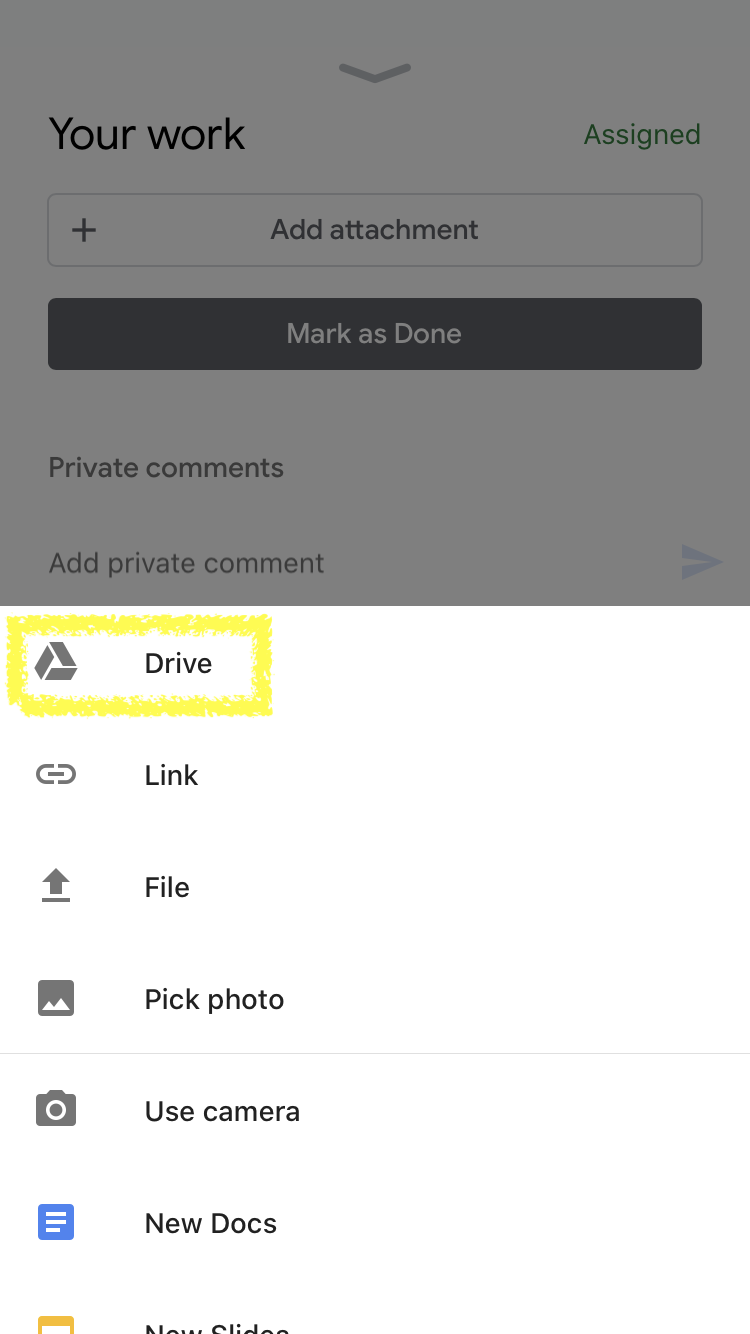
4B) Submit To assignment
Instructions match the screen shots:
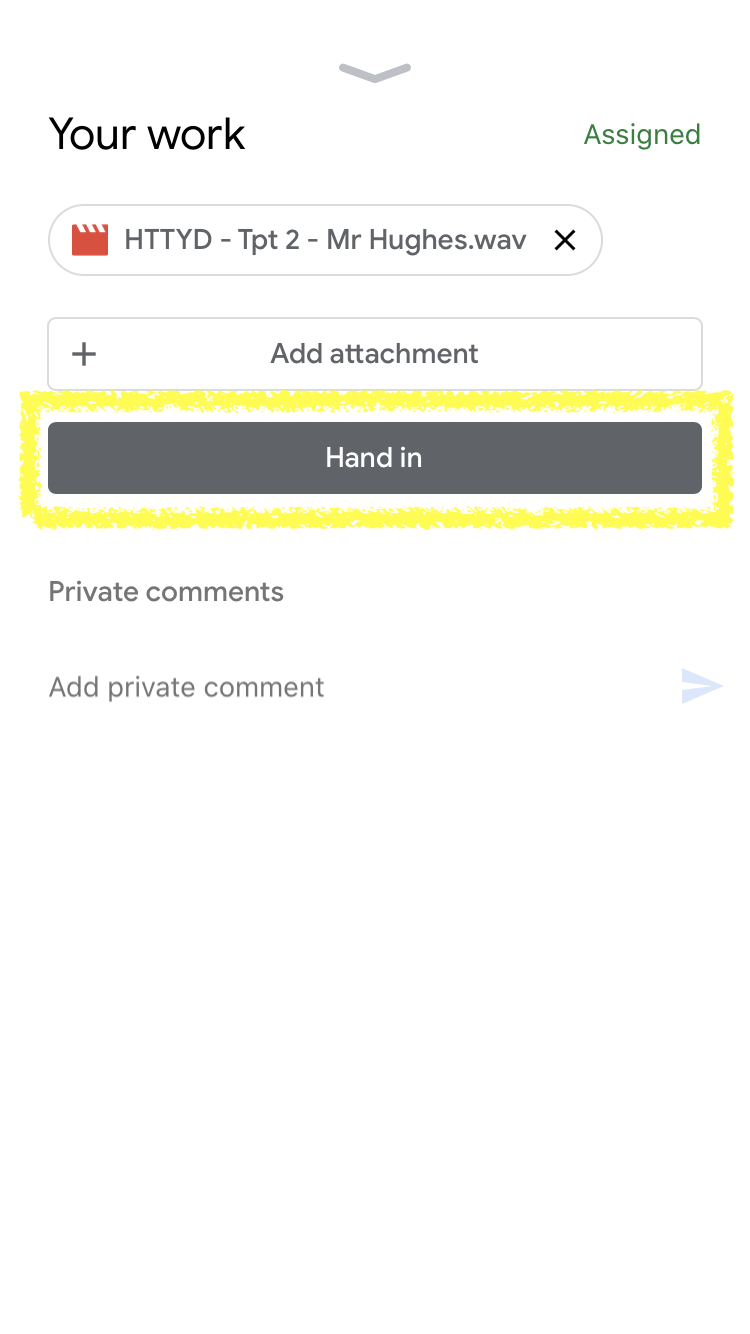
Find the assignment in the Google Classroom app
Tap the Up Arrow at the bottom
“+ Add Attachment”
Choose Google “Drive”
Find where you saved the file and choose it
“Hand In”
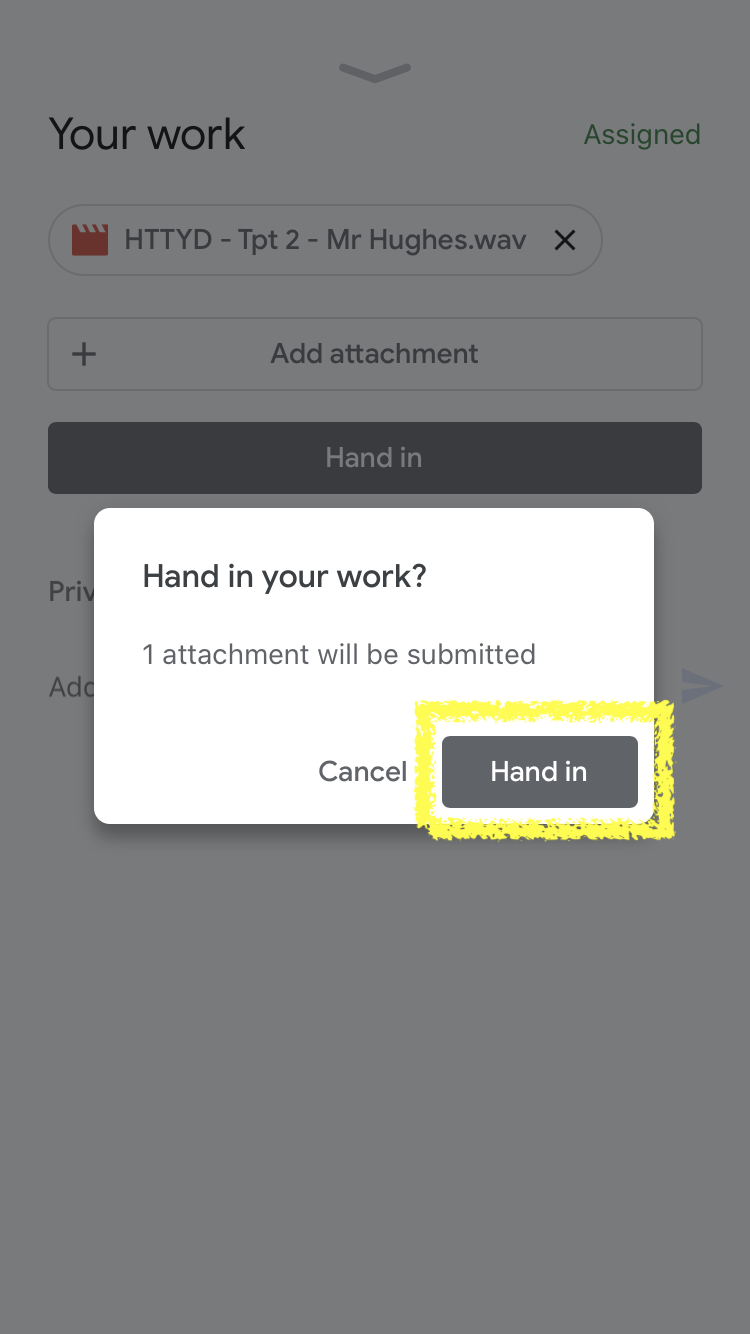
“Hand In”